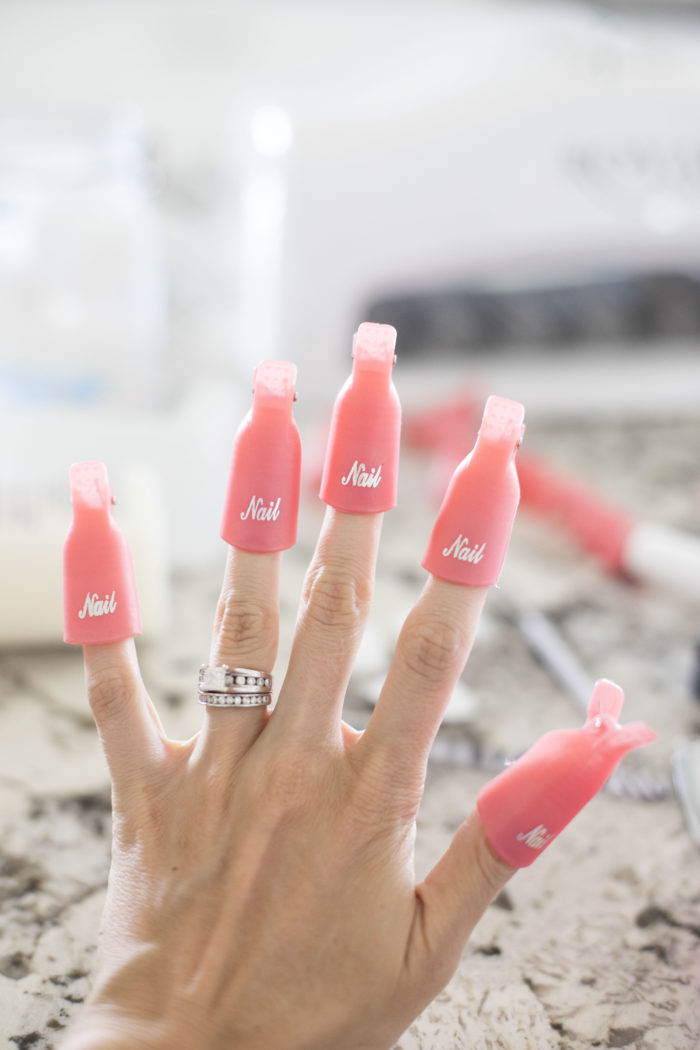
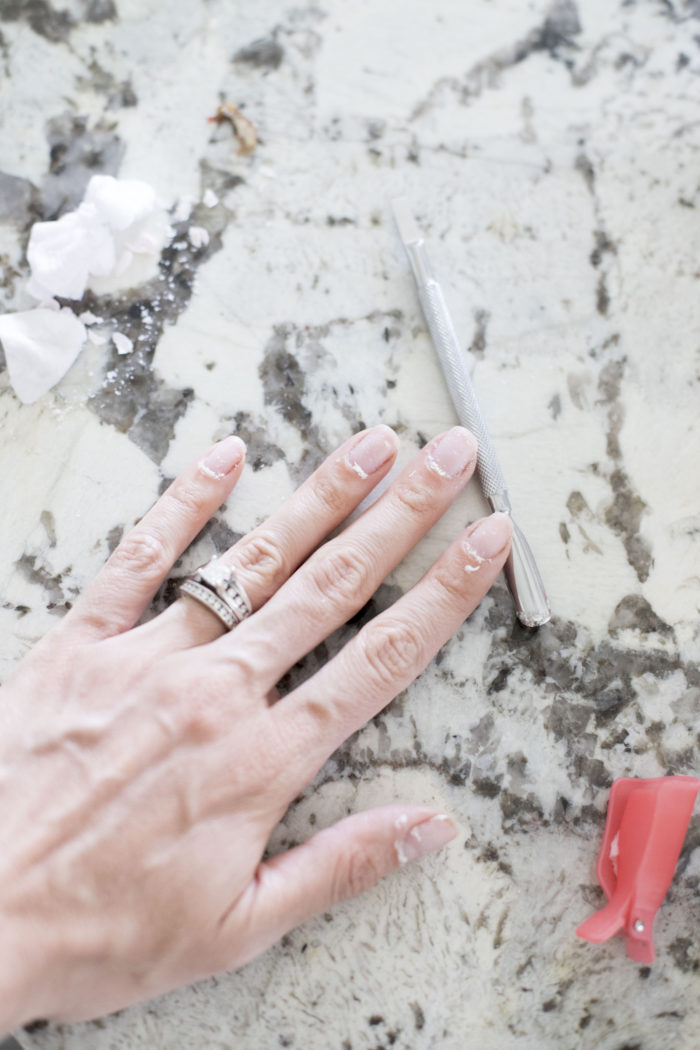
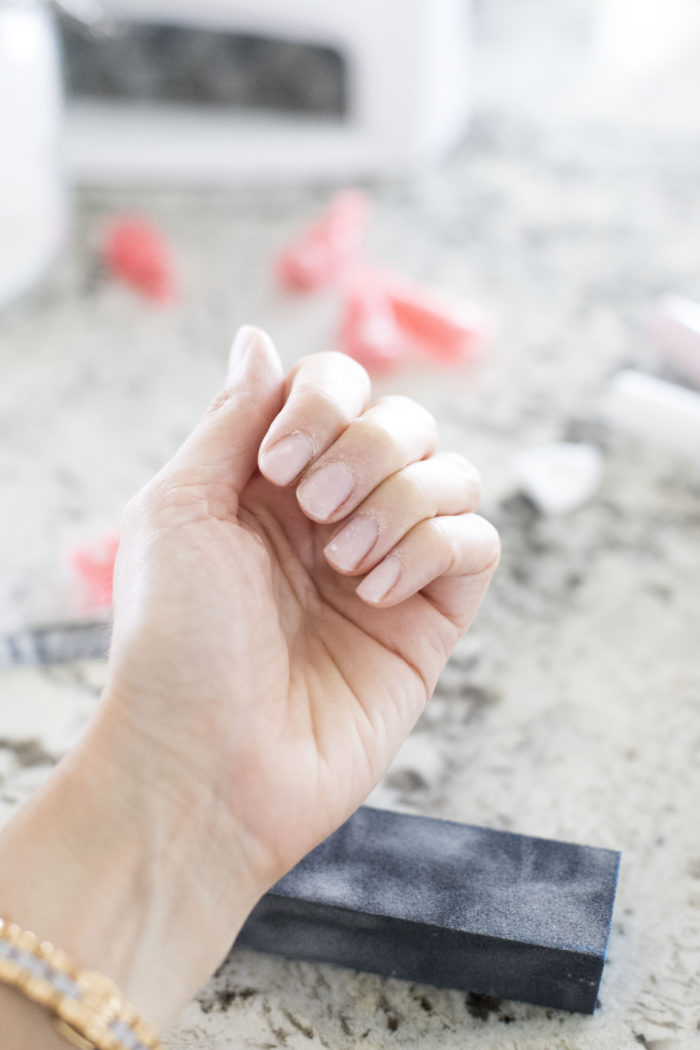
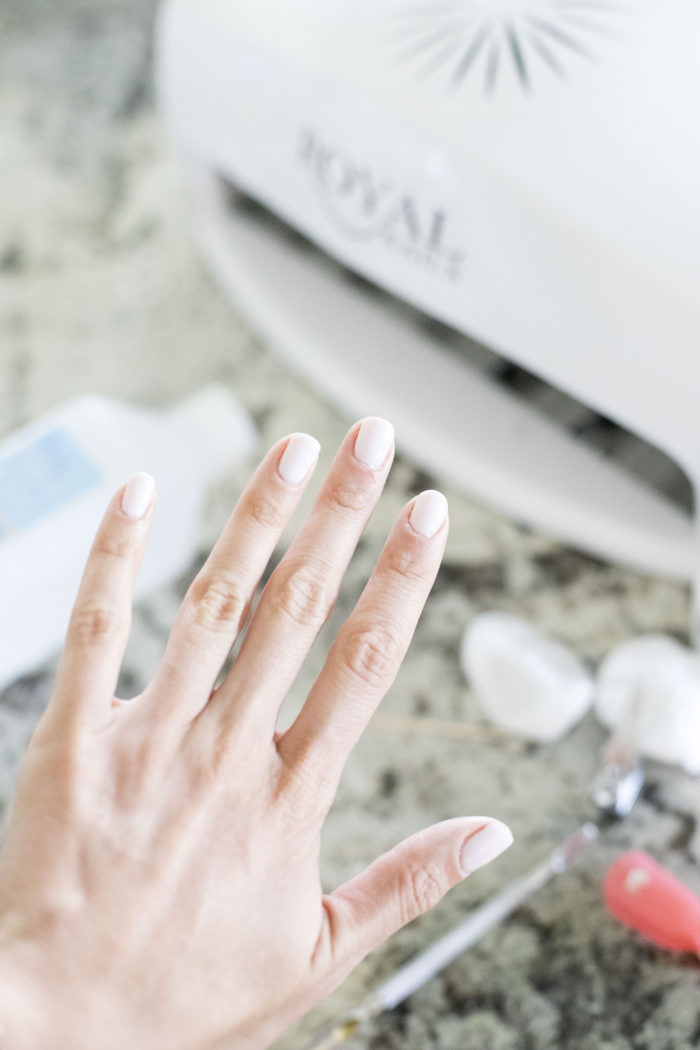
• AMAZON STOREFRONT
  • WALMART FAVS
  • FOOD
    • APPETIZERS
    • BREAD
    • BREAKFAST
    • DRINKS
    • SIDE DISHES
    • SNACKS
    • SWEETS
    • DINNER
  • DISCOUNT CODES
  • INFERTILITY SUPPORT
  • OUR INFERTILITY STORY
    • FROZEN EMBRYO TRANSFER (Current Cycle!!)
    • BEGINNING OF OUR INFERTILITY JOURNEY
    • 3RD ROUND OF IVF
    • THE IVF CYCLE THAT WORKED – WHAT WAS DIFFERENT
    • TWIN PREGNANCY
    • BIRTH STORY
  • SIGN UP FOR TEXTS
  • Nav Social Menu

    • Facebook
    • Instagram
    • Pinterest
    • Twitter
    • YouTube

A Slice of Style

  • About
  • Contact
  • Blog Posts
    • Fashion
    • Amazon
    • Walmart Favorites
    • Skincare
    • Home Decor
    • Family
    • To My Beautiful Child
    • Travel

How to do Gel Nails at Home

Shop

8 Sep

how to do gel nails at home featured by top Utah beauty blog, A Slice of Style: image of nail equipment

So, there’s a little back story to this gel nails at home tutorial. I bought some of these products almost 3 years ago because I thought I was going to start doing gel nails at home. I tried twice…and wanted to punch a hole in the wall each time. I did not know what I was doing, and even when I followed tutorials, they didn’t work for me!

The past year and a half I have gone to the salon at least once a month to get my gel nails done. I have paid a lot of attention to what products they were using, but I still didn’t have the desire to do my nails at home. There were a couple things that bothered me though – 1) Getting my nails done was so time consuming! I had to drive to and from the nail salon (typically 20 minutes each way) and then I was there for an hour, and 2) I couldn’t find anyone that I absolutely loved going to. The last time I went, the man doing my nails was not very nice, to say the least. I accidentally bumped my nail on the nail drier and he looked at me and proceeded to lecture me on why I should hold my hand still, be more careful, and then rolled his eyes at me.

Sooooo….that leads me here today! These two factors motivated me to give doing my gel nails at home another shot. I had learned a few things over the years. It’s nice, because now I can sit down and watch a show on TV (who has time for that?! I do now) AND do my nails at home while saving money. It’s a win/win. Oh, and no one rolls their eyes at me.

First things first, you will need the supplies to get gel nails at home. Keep in mind that it’s an initial investment but it will pay off over several times, and then be significantly less expensive then going to the salon each month. The supplies that you buy will either make or break your success, and like I said, I have been watching what to use and I think that a big reason why I got so incredibly frustrated the first few times I did my own gel nails is because I didn’t have the correct supplies for success.

THE SUPPLIES YOU’LL NEED FOR GEL NAILS AT HOME:

  1. Nail lamp. The one that I got a few years ago is no longer for sale, but I did my research and this one is a great option. It has hundreds of great reviews and is about 1/4 the price that I paid for mine.
  2. Acetone to remove the polish. This is the kind that I bought that I love (it hadn’t arrived by the time I took these pictures which is why it’s not pictured).
  3. Cotton pads
  4. Nail polish soak off clips (these make it soooooo much easier to remove the polish)
  5. Cuticle remover liquid
  6. Nail file – I HIGHLY recommend a glass nail file. This one is a great option!
  7. Steel cuticle remover and cutter – I got this one and love it but this is a great combo for cuticle clippers AND cuticle remover
  8. Nail clippers
  9. Cuticle clippers
  10. Nail buffer block
  11. Rubbing alcohol
  12. PH bond, base coat and top coat – this is a great package right here. My favorite brands of gel nail polish are Gelish and OPI
  13. Gel nail polish – search here for some favorite colors. I love this color, this color and this color a lot.

DOING YOUR OWN GEL NAILS AT HOME: A COMPLETE GUIDE

STEP 1:

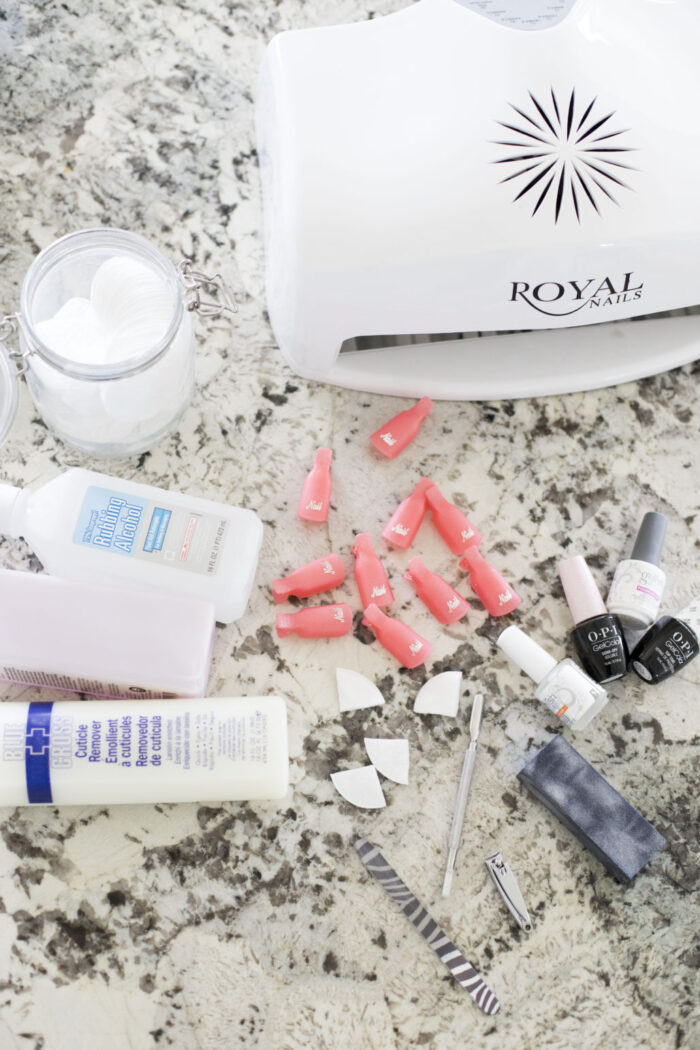
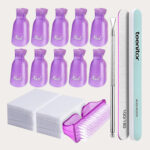
If you have gel polish on already, you need to cut your cotton pads into 4 pieces, and soak each of them with acetone. Buff the top of each nail, then cover your nail with the cotton pad and then apply the nail polish soak off clip to hold it in place. Keep it there for 15 minutes. This is a great time to watch a good show on TV!
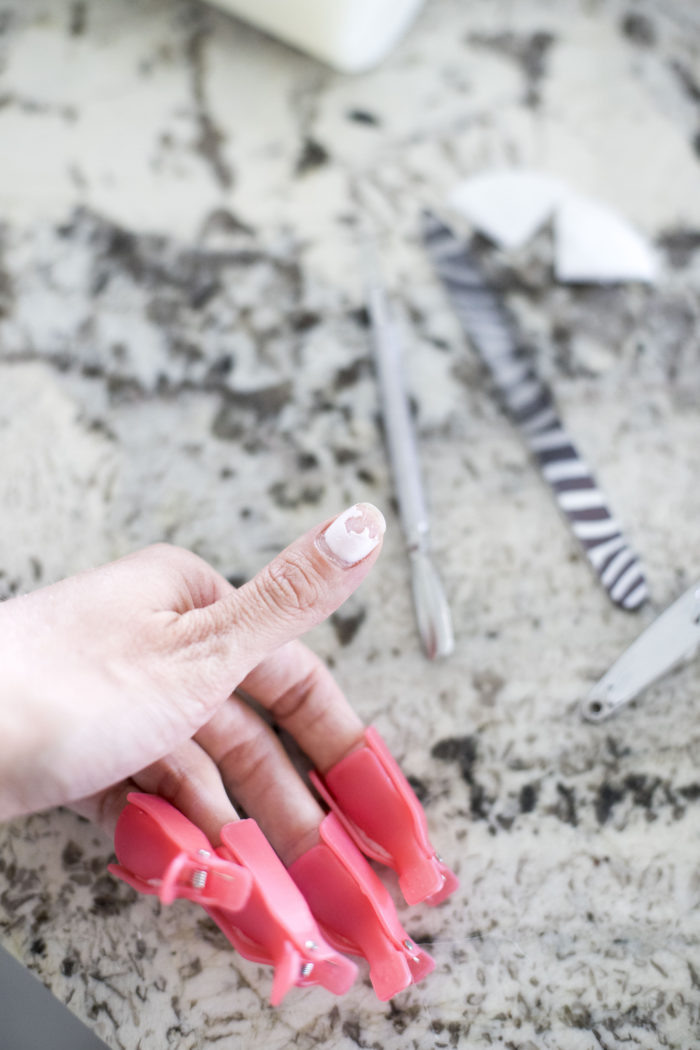
how to do gel nails at home featured by top Utah beauty blog, A Slice of Style

STEP 2: 

Remove the clips and begin scraping off the gel polish with the steel cuticle remover and scraper. The polish should be lifting up and it shouldn’t be too difficult to remove at this point. If it is, apply another cotton pad with acetone for a bit longer.
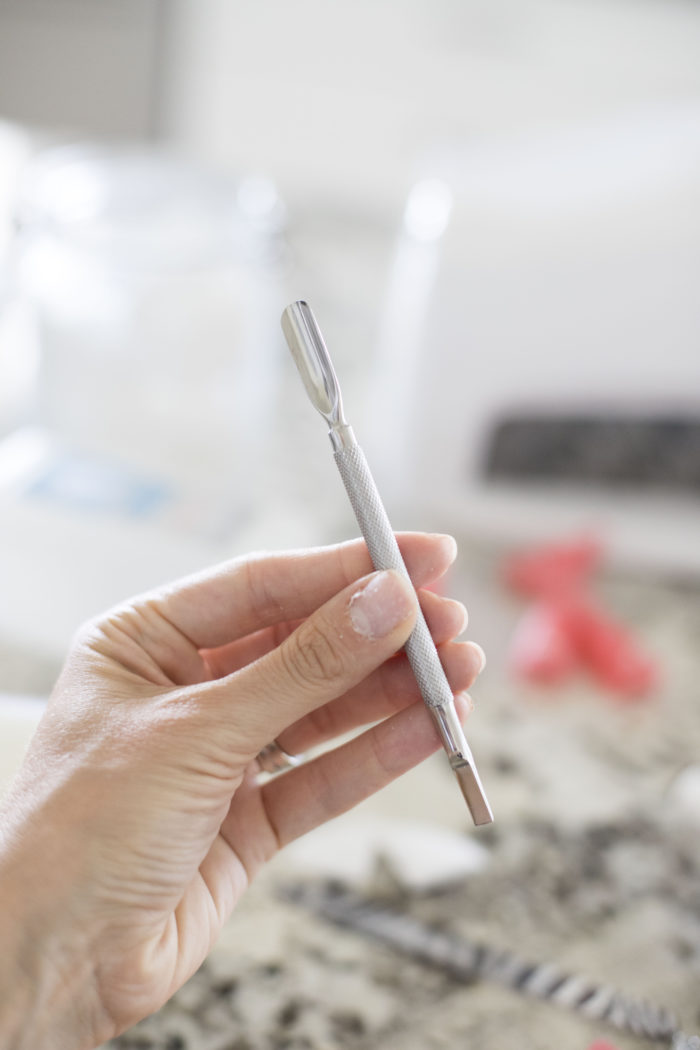
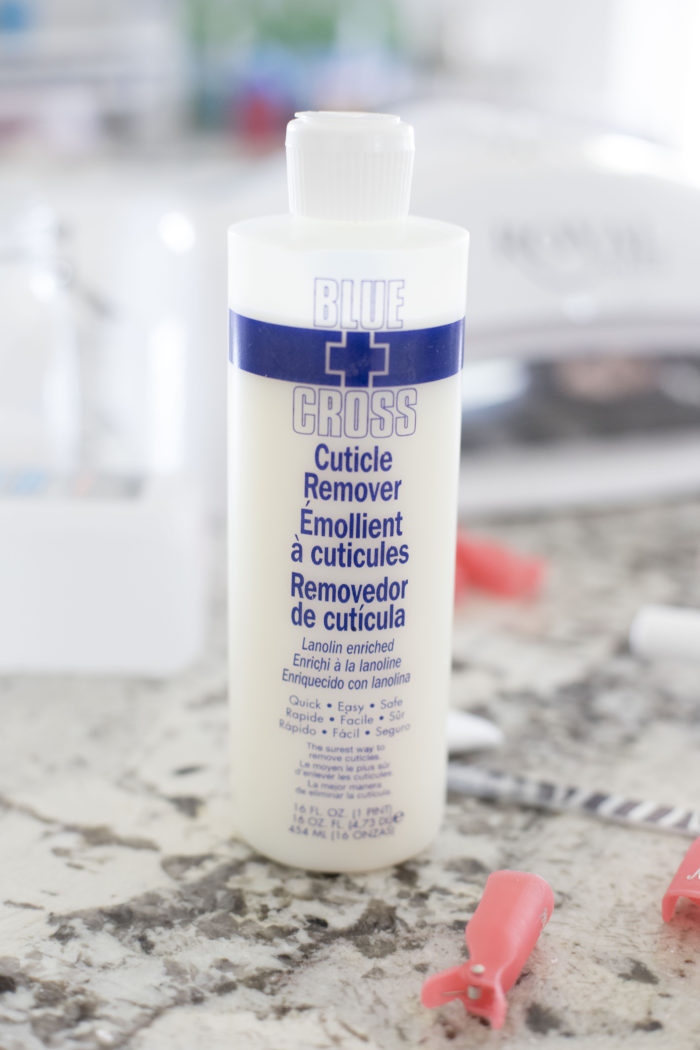
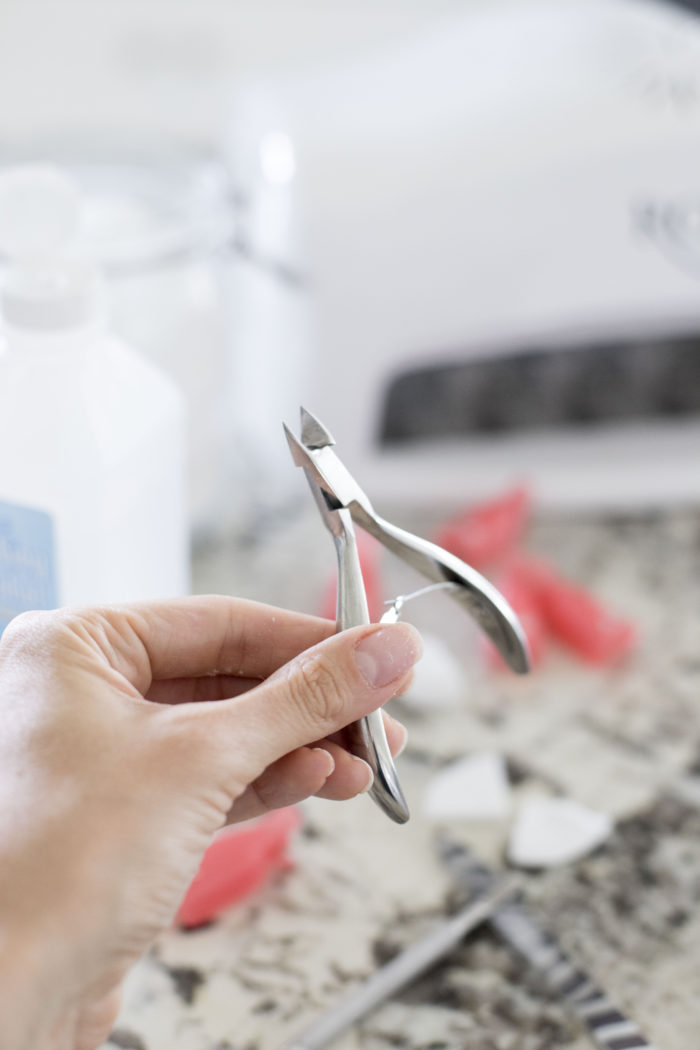
how to do gel nails at home featured by top Utah beauty blog, A Slice of Style: image of nail equipmenthow to do gel nails at home featured by top Utah beauty blog, A Slice of Style: image of nail equipment

STEP 3:

Apply the cuticle remover liquid onto your cuticles and rub in. Use the the steel cuticle remover and scraper to push down your cuticles and scrape them off your nail. Use the cuticle clipper to cut off the cuticles from your nail.
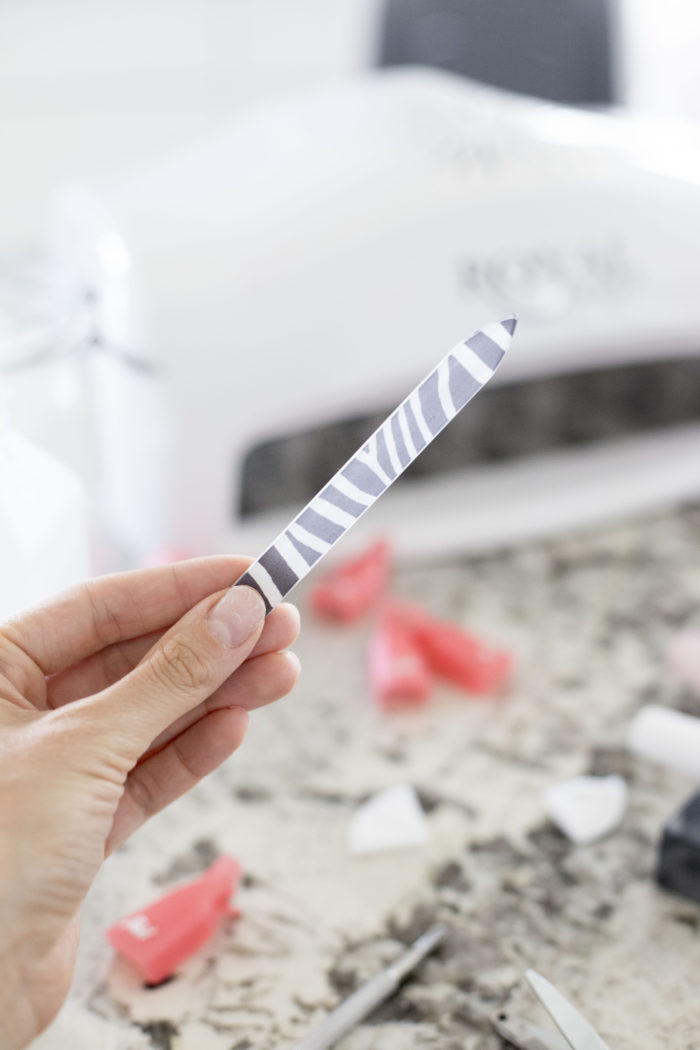
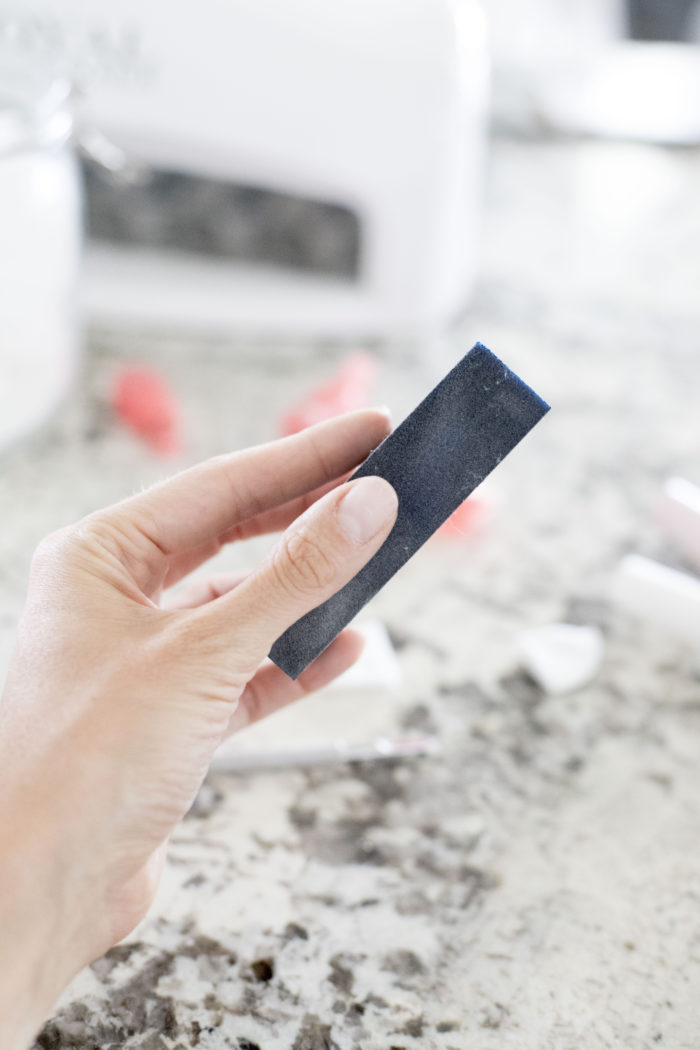
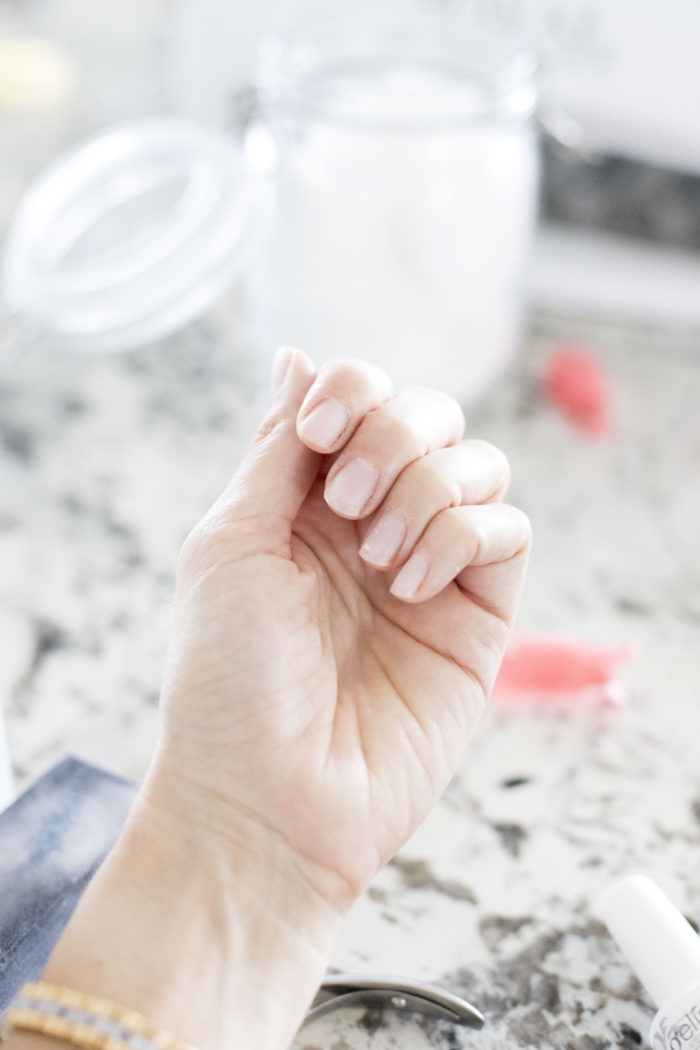
how to do gel nails at home featured by top Utah beauty blog, A Slice of Style: image of nail equipment: image of cuticle removerhow to do gel nails at home featured by top Utah beauty blog, A Slice of Stylehow to do gel nails at home featured by top Utah beauty blog, A Slice of Style

STEP 4:

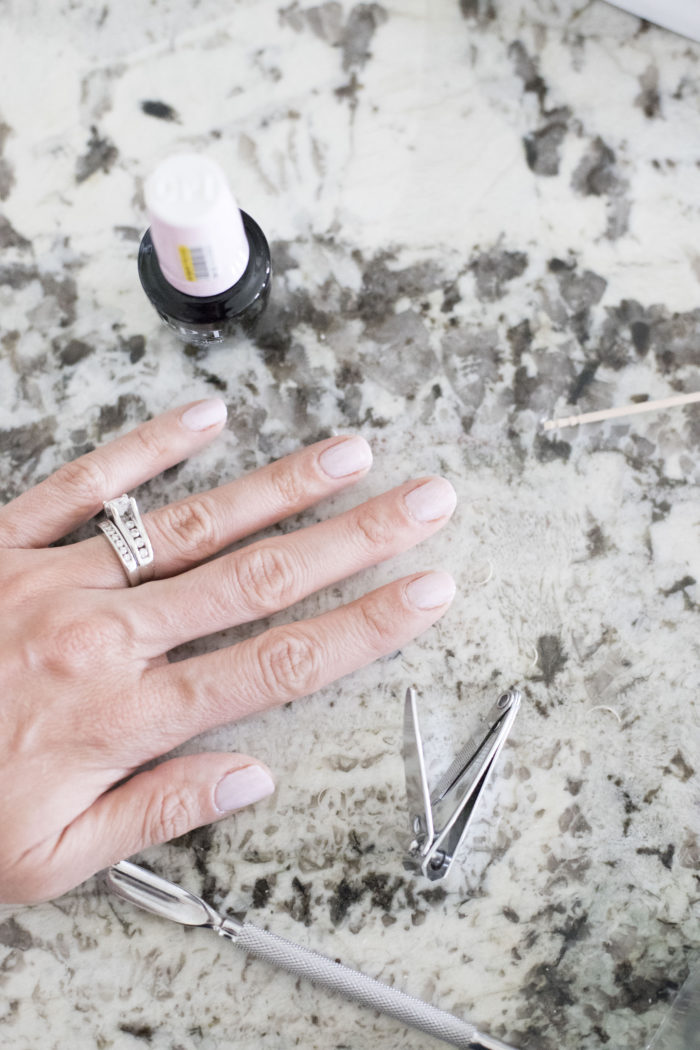
Clip your nails to the length that you want them, use the nail file to shape them, and buff the tops of your nails to take off a bit of the top layer of your nail. This will help the gel polish to adhere to your nails better.
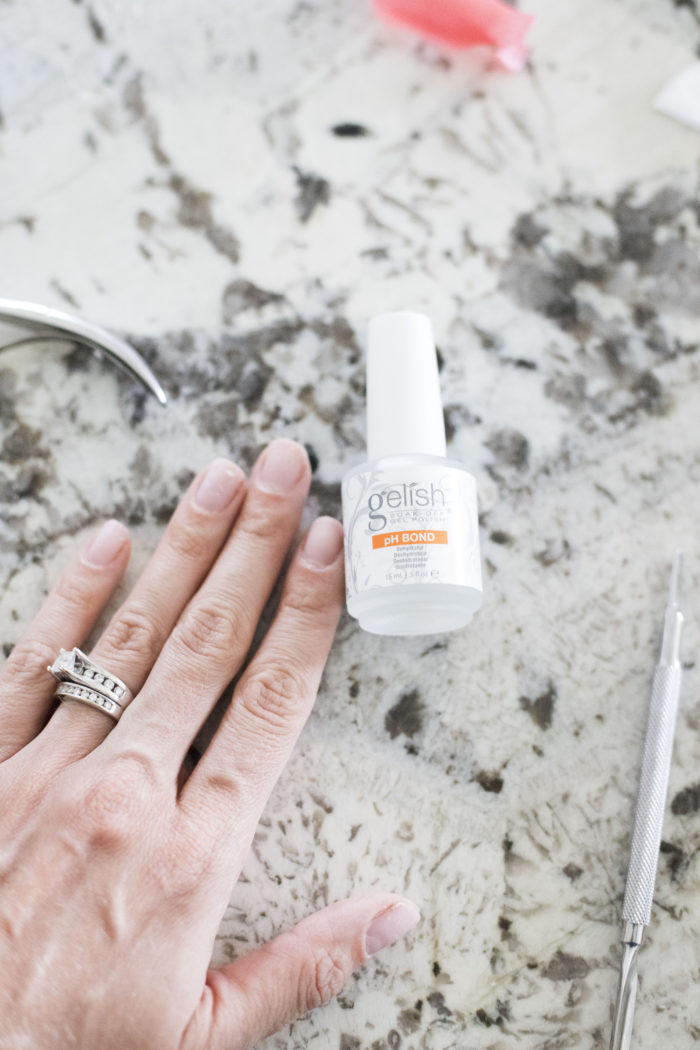
how to do gel nails at home featured by top Utah beauty blog, A Slice of Stylehow to do gel nails at home featured by top Utah beauty blog, A Slice of Stylehow to do gel nails at home featured by top Utah beauty blog, A Slice of Style: image of nail equipment

STEP 5:

Rinse your hands with water (no soap) and remove all of the dead skin and dry well. Make sure the nails are completely clean. Paint on the PH Bond to help dry out of your nails.
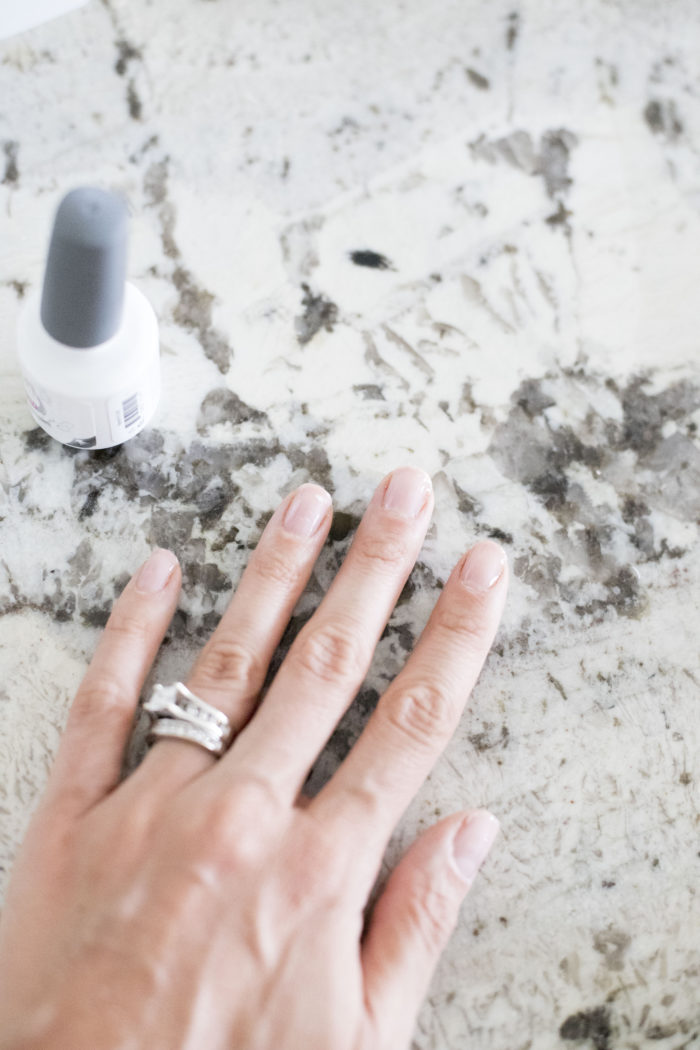
how to do gel nails at home featured by top Utah beauty blog, A Slice of Style: image of Gelish PH Bond

STEP 6:

Apply an extremely thin layer of the base coat gel polish onto your nails then cure under the light for 120 seconds. Remember, make the layer as THIN as possible! This was my huge downfall when I wasn’t able to do gel nails at home well. It started to build up into a big mess. Not anymore, sister! I learned my lesson.

how to do gel nails at home featured by top Utah beauty blog, A Slice of Stylethow to do gel nails at home featured by top Utah beauty blog, A Slice of Style

STEP 7: 

Apply one coat of gel polish (remember, as thin as you possibly can!) If you get the polish on your skin, use some acetone to wipe it away before putting your hand under the lamp again. I also like to use toothpicks to wipe away small amounts from my cuticles if I happen to get polish there. They key is not get any polish on your cuticles or they will start to peel much, much faster. Let the polish cure under the lamp for 120 seconds, then do another layer and cure for another 120 seconds. Some lighter polish needs a 3rd layer, and if so, do a 3rd layer of polish then cure for 120 seconds.

how to do gel nails at home featured by top Utah beauty blog, A Slice of Stylehow to do gel nails at home featured by top Utah beauty blog, A Slice of Style how to do gel nails at home featured by top Utah beauty blog, A Slice of Style

STEP 8:

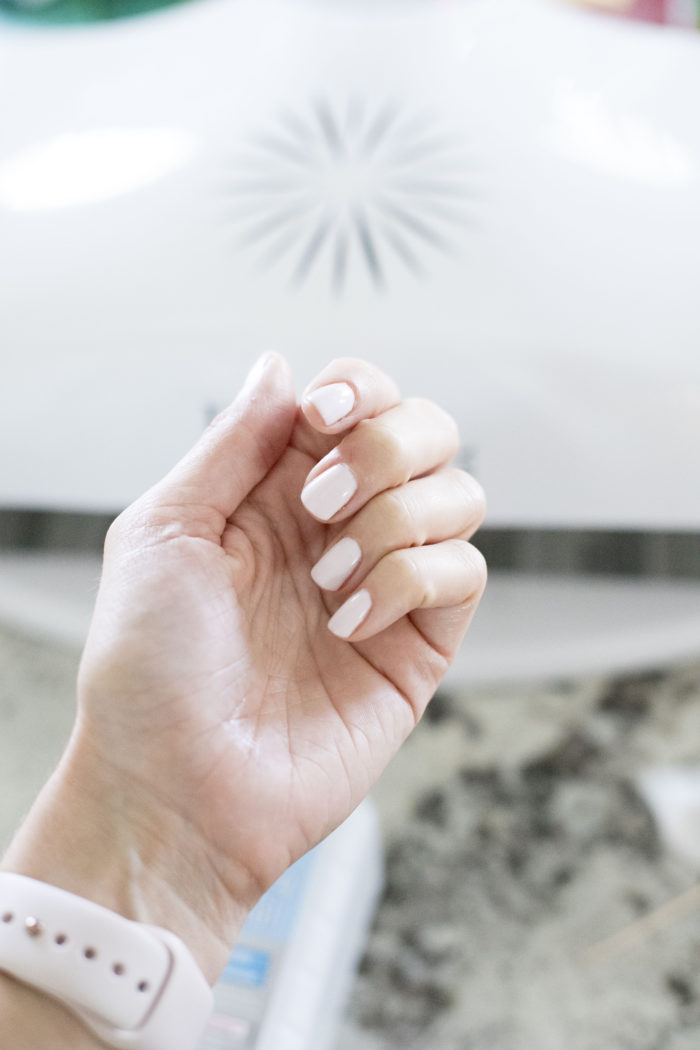
Apply the top coat then cure it under the lamp for 120 seconds.
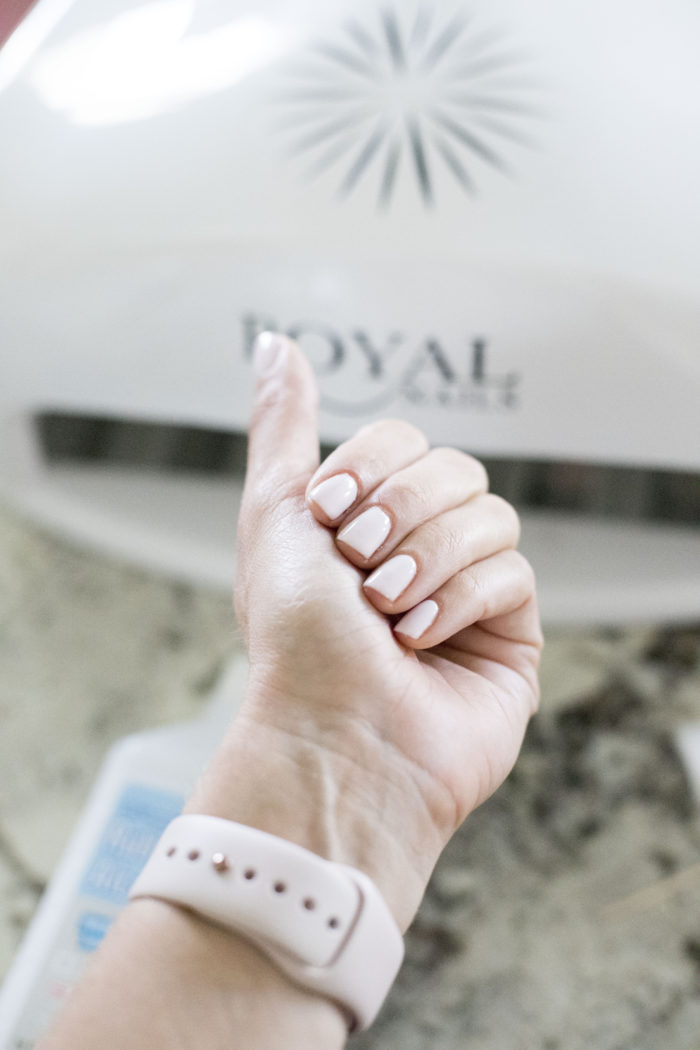
how to do gel nails at home featured by top Utah beauty blog, A Slice of Style

STEP 9:

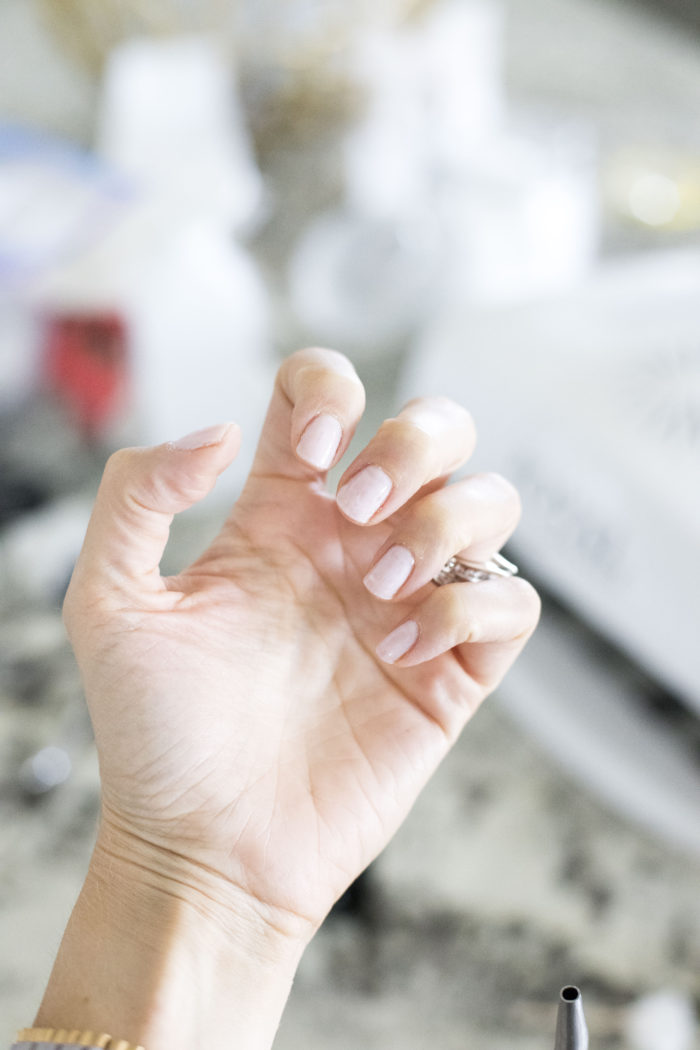
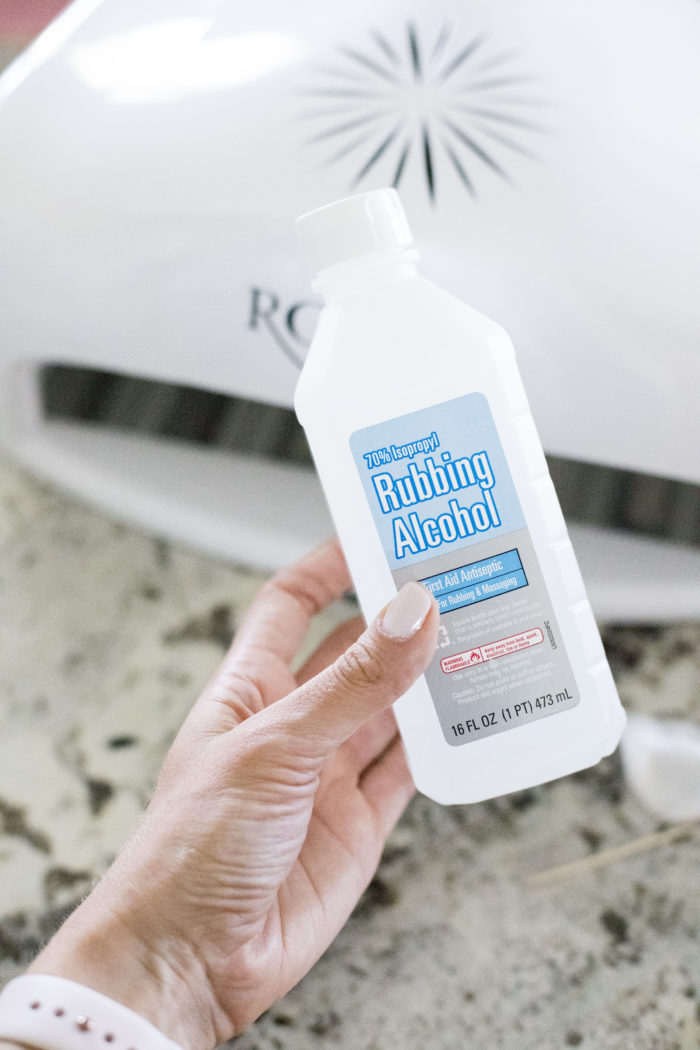
Soak a cotton pad in rubbing alcohol and rub each nail well. You’re done! You don’t have to wait for it to dry and you can touch anything without ruining your manicure. This is why I love gel polish!!

how to do gel nails at home featured by top Utah beauty blog, A Slice of Stylehow to do gel nails at home featured by top Utah beauty blog, A Slice of Stylehow to do gel nails at home featured by top Utah beauty blog, A Slice of Style

THINGS TO REMEMBER WHEN DOING GEL NAILS AT HOME:

  • You are not going to be perfect at doing gel nails at home the first time! Practice makes perfect. Be patient and let yourself learn by doing it many times.
  • Your nails may peel quickly the first few times because, again, you are not going to be perfect at this right from the start. Remember, I quit and didn’t do it for 3 years because I thought I wasn’t cut out for it! With the tools above and practice, you will be an at home gel nail queen in no time.
If you love this gel nails at home tutorial, you will also love these posts:

How to Curl Long Hair FAST and Keep Hair Healthy

My Absolute Favorite Skincare That has Changed my Skin

The 4 Best Eye Makeup Products you Need!!


Related Posts

  • Our Home During Christmas

    {Mug: Williams-Sonoma} Merry Christmas! I hope you are enjoying some…

  • Macy's Home Sale

    !function(d,s,id){var e, p = /^http:/.test(d.location) ? 'http' : 'https';if(!d.getElementById(id)) {e…

  • 2018 Home Decor Update

    Happy New Year! Something that is important to me and…

104 Comments

Previous Post: « Our Favorite Baby Carriers of All Time: MiaMily
Next Post: How to Curl Your Long Hair + Add a lot of Body »

Reader Interactions

Comments

  1. Chandra says

    September 8, 2017 at 8:21 am

    Love this! They look so good! What color polish did you do in this tutorial? And about how long does the process take from start to finish?

    Reply
    • Jenica Parcell says

      September 9, 2017 at 9:14 pm

      Thank you! It takes me about 45 minutes to an hour and I used OPI Let’s be Friends 🙂

      Reply
      • Gloria th.glori says

        June 2, 2020 at 9:13 pm

        Today I was frustrated with gel mani /I did for first time.why? It was tacky. What I did wrong.? Please help me

        Reply
        • Jenica Parcell says

          June 8, 2020 at 12:14 pm

          Make sure you wipe off the top with alcohol, otherwise it will stay tacky 🙂

          Reply
    • Kathe Sears says

      January 15, 2021 at 1:36 pm

      I thought I had everything I needed to do my gel nails at home as we are in “Covid Home Quarantine” per our Gov. I did them twice and they were peeling off a day or so ….. I read your tutorial and realized I had been missing the ph bond…. I am a visual person! Can’t wait for my order from Amazon, and I can’t wait to try again…..

      Reply
      • Jenica Parcell says

        February 24, 2021 at 8:58 am

        Can’t wait for you to try it! Good luck! 🙂

        Reply
  2. Amy says

    September 8, 2017 at 11:22 am

    What color did you use?

    Reply
    • Jenica Parcell says

      September 9, 2017 at 9:13 pm

      OPI Let’s be Friends 🙂

      Reply
      • JODI says

        October 11, 2019 at 4:18 pm

        I just went through and bought everything from your list… I can’t wait to give it a try! Thanks!

        Reply
        • Jenica Parcell says

          October 15, 2019 at 7:40 pm

          I’m excited for you! 🙂

          Reply
  3. Kim says

    September 8, 2017 at 12:31 pm

    Can you apply this to doing gel on your toes too? ????

    Reply
    • Jenica Parcell says

      September 9, 2017 at 9:13 pm

      Yes! It applies to toes too 🙂

      Reply
  4. Lisa says

    September 8, 2017 at 9:14 pm

    Love this! I just started doing my own gels a few months ago and it’s always nice to hear how other people do that . I also use OPI funny Bunny which I absolutely love in just put in an order with Madam glam – it’s another gel polish brand that I’ve heard good reviews about – hopefully it’s a winner! BTW – we are have these nail polish remover clips been my whole life ?!?!?

    Reply
    • Jenica Parcell says

      September 9, 2017 at 9:13 pm

      The clips have changed my life! SO much faster and easier than foil!

      And thank you! I want to try those polishes you recommended!

      Reply
      • Lisa says

        September 17, 2017 at 4:54 pm

        You should! I got a few fall colors and they are great, good price , great coverage and usually only 2 coats!

        Reply
  5. Kodi says

    September 8, 2017 at 9:15 pm

    You are so amazing! Thank you for posting this!!! I’ve been waiting to buy things until you posted. ????????????

    Reply
    • Jenica Parcell says

      September 9, 2017 at 9:04 pm

      You are so welcome, I’m so glad this helps!!

      Reply
  6. Diana says

    September 8, 2017 at 11:01 pm

    Thanks for this great article. The lady I go to does a good job, but tells me way too much about her love life???? But, She puts the cotton and foil then puts me up near a light. She said the heat looses the polish, which means less scraping!

    Reply
    • Jenica Parcell says

      September 9, 2017 at 9:04 pm

      That is a great tip, I’m going to try that next time! 🙂 Ha ha ha her love life lol

      Reply
  7. Amy Williams says

    September 9, 2017 at 2:13 pm

    Love the post you did and can you tell me the color and brand that’s on your nails in the picture.

    Reply
    • Jenica Parcell says

      September 9, 2017 at 9:03 pm

      This is OPI Let’s be Friends! 🙂

      Reply
  8. Sara says

    September 9, 2017 at 5:49 pm

    I have always wanted to try it at home!! Thank you for posting this!

    Reply
    • Jenica Parcell says

      September 9, 2017 at 9:03 pm

      You bet! xoxo

      Reply
  9. Sarah M. says

    September 10, 2017 at 9:54 am

    Now that you’ve perfected your method, how much wear time would you say you get? Before they start to peel/chip? Approximately? Thanks! 🙂

    Reply
    • Jenica Parcell says

      September 10, 2017 at 8:44 pm

      Hi, Sarah! Right now it’s about 1.5 weeks but I’m still working on perfecting the application! I think I could get it to last longer!

      Reply
  10. Nicola says

    September 11, 2017 at 2:07 pm

    Thanks for sharing – I haven’t seen those nail polish soak-off clips before, they look amazing!

    I started doing my own gel nails at home about 4 years ago for the same reasons as you – the drive to the salon, the time away from my family, having to wait at the salon, etc. etc. Now I do my nails at home after my kids are in bed and watch a show. It’s wonderful. Practice makes perfect! Many of my friends can’t believe I have a steady hand to do my opposite hand but it’s like second nature now. Just keep practicing and thin coats of polish are definitely the key! It’s an investment to buy the light and gel nail polishes but if you are spending $30-$40 at the salon, the equipment pays for itself in about 5 manicures – so worth it!

    Reply
    • Jenica Parcell says

      September 11, 2017 at 3:16 pm

      Thank you so much for your amazing feedback; I really appreciate it! I’m excited to keep doing this and get better and better. I love that I can watch my shows and do this at the same time!

      Reply
      • Catherine says

        April 12, 2020 at 5:29 pm

        Hi, I did my nails last night but they didn’t turn out very good. Is it ok to file some and add another layer of colour? (Then obviously top coat and alcohol rub after). Or is it best to start from new nail again? Ps I can’t wait to find those nail lips for easier removal.

        Reply
        • Jenica Parcell says

          April 21, 2020 at 12:34 pm

          It’s always best to start with a fresh nail to avoid peeling BUT you could always try it to save time and it might work! And then if it doesn’t, you can remove and start again. This definitely takes practice and won’t look perfect the first time. You’re doing great!

          Reply
  11. Lisa says

    September 17, 2017 at 5:00 pm

    Hey Jenica – another question I was just thinking of, do you cap the free edge? I see some tutorials That say this is a must but I have a hard time doing it.

    Reply
  12. Rose S. says

    March 26, 2018 at 5:19 am

    Do you recommend the no light gel polish sold at Walmart stores? I have a light but wanted to know what you thought. Also, when I have applied the thin coat of base coat it looks as if it is not perfectly smooth, as if not enough gel on the wand itself, how to determine how much is enough???? Any ideas?

    Reply
    • Jenica Parcell says

      March 28, 2018 at 2:12 pm

      Rose – I have never used the no light gel polish so I can’t say!

      Reply
  13. Brittan says

    July 12, 2018 at 7:08 am

    When I googled “how to do gel nail at home” your blog post popped up and I am so thankful it did! I currently have all those items in my Amazon cart. I do have a few questions. First, do you mix brands of gel polish? (like do you use a gelish polish for the base and then OPI gel color on top?) Second, have you ever tried the gel polish Elite99? I found a good deal on that brand on Amazon, but I want to make sure they are quality before I do. Lastly, do you buy all your gel polishes individually or do you buy them in bulk somewhere? Thanks so much, I can’t wait to try this!

    Reply
  14. Marilyn says

    August 10, 2018 at 5:17 pm

    I bought the clips to help remove old gel so much better than foil! I followed your directions & will now be doing my own gel nails. Thanks

    Reply
    • Jenica Parcell says

      August 13, 2018 at 11:47 am

      YES! I love them so much more than foil!! I’m so glad this is so helpful for you! 🙂

      Reply
  15. Elsa says

    August 14, 2018 at 9:02 am

    Thanks, I just read your post and did my first gel mani! I’m surprised at how well it turned out. Thanks for the instructions and tips, I got the whole gel setup from my friend with no instructions!

    Reply
    • Jenica Parcell says

      August 14, 2018 at 11:27 am

      I’m so glad you love it!! It’s so nice to be able to do it from home!

      Reply
      • Marilyn says

        August 31, 2018 at 11:15 pm

        Have followed your tips & directions, just did my 3rd set, they are lasting longer than salon & I don’t get bubbles (a real pet peeve of mine) I figure so far I’ve saved over $100.
        Thanks

        Reply
        • Jenica Parcell says

          September 2, 2018 at 1:58 pm

          That makes me so happy!! Thank you for letting me know 🙂

          Reply
  16. Shaleen says

    August 17, 2018 at 4:23 am

    This is a great step by step with usefull images to get a professional loking gel nail polish look at home. You have given me the confidence to try it for myself. Especially if my nails turn out like yours. Thanks again.

    Reply
  17. Lisa says

    August 27, 2018 at 6:15 pm

    Hey girl, I just found your site now. It’s very helpful!
    Can you tell me what you used for a table? I only have our dining room table which is not suitable for this project so I was thinking of putting some kind of table cloth down that won’t allow anything to spill through.
    ALSO if you’re right handed, how do you cut your cuticles on the opposite hand without anY niches? Or do you? LOL

    Reply
  18. Mark David says

    November 15, 2018 at 9:48 am

    Hi Jenica!

    How are you? I really enjoyed your article on doing gel nails at home. I’m in the process of developing a gel nail travel kit to sell on amazon. I’d be more than happy to promote your blog on my social media sites since it’s directly related to my product(s). I would love your opinion on my gel nail travel kit, due to your experience on the best supplies to use.

    Take care,

    Mark

    Reply
  19. Brianna says

    January 22, 2019 at 7:02 am

    This is such an informative step by step guide! Sometimes going to the salon constantly just is not affordable and doing it at home could save you so much money. Thank you for sharing!

    Reply
    • Jenica Parcell says

      February 1, 2019 at 4:26 pm

      Thank you so much for your kind comment! I am so happy you are finding this tutorial helpful!

      Reply
  20. Jenica Parcell says

    February 1, 2019 at 4:23 pm

    Thank you so much for your kind comment! I am so glad this post is helpful!

    Reply
  21. Linda Dennis says

    March 16, 2019 at 9:08 pm

    Love home gel nails. Your guide is awesome. I do have one problem..keeping the layers thin! Any suggestions?

    Reply
    • Jenica Parcell says

      April 30, 2019 at 3:14 pm

      Thank you so much Linda! My best suggestion would be to wipe the brush against the rim of the bottle of gel to get the excess off!

      Reply
  22. Heather says

    April 20, 2019 at 3:19 pm

    I’m excited I found a blog with so much confidence. I am spending 50-60 each time because I get tips and now my new lady does gel instead of acrylic so it’s more. I am getting tired of spending so much a month.

    Do you ever add tips to your nails or do you always stay with your natural nails? I’m wondering if I need to do anything differently to accommodate tips.

    Thank you,

    Reply
    • Jenica Parcell says

      April 30, 2019 at 3:12 pm

      Thank you so much Heather!! I have never tried to put tips on my nails this way so I am sorry I don’t have any advice for you. I hope you find a way to do it!

      Reply
  23. Chloe says

    May 7, 2019 at 10:02 am

    Can I ask where you bought the OPI gel polish? OPI doesn’t let you directly buy gel polish from them since it’s supposed to be “salon only”, and whenever I find it sold elsewhere online, it’s through a third party retailer, and I’m skeptical. Some of the reviews say that the product is old, not the same as listed, etc. Thanks so much for any feedback!

    Reply
    • Jenica Parcell says

      May 9, 2019 at 12:44 pm

      I actually got it on a random site I googled! Also, local beauty supply stores have it!!

      Reply
  24. joni says

    June 24, 2019 at 1:35 am

    I have read your full post, This is really nice post and nice information too. Thanks for sharing such a useful information about gel-nails.
    VolgoPoint Spider Nail Gel

    Reply
  25. Kelly says

    October 7, 2019 at 7:42 am

    Hi. When I click on the link that takes you to the acetone you use, it doesn’t come up. If you can give me the name of it, I’ll search that way. Thanks!

    Reply
    • Jenica Parcell says

      October 9, 2019 at 3:58 pm

      Hey Kelly! I just tried the link and it works for me? I’m sorry it is giving you problems. Here is the link: https://amzn.to/33dCgNK

      Reply
  26. IDN Live says

    November 6, 2019 at 1:15 am

    A very good described article, full with valuable information

    Reply
    • Jenica Parcell says

      November 6, 2019 at 2:13 pm

      Thank you! 🙂

      Reply
  27. Lynn says

    November 13, 2019 at 9:06 am

    How did you find the OPI gel polish? Everywhere I’ve looked will only sell to a salon or someone with a license.

    Reply
    • Jenica Parcell says

      November 25, 2019 at 4:08 pm

      I just get it on Amazon! Sometimes it is hard to find though!

      Reply
  28. Daniel says

    November 25, 2019 at 4:48 pm

    Hi! Great tutorial! If I want clear gel nails, do I just skip the gel nail polish step and just apply the base and top coats?

    Reply
    • Jenica Parcell says

      January 13, 2020 at 2:09 pm

      Yes! I haven’t tried it before, but that’s what I would do if I just wanted clear nails! 🙂

      Reply
  29. Nicola says

    December 3, 2019 at 1:02 pm

    I love this. I really want to start doing my own nails and gel works the best for me. Since I’m not a qualified nail tech, I want to know what gel nail products, nail care and art equipment do you NEED in your kit when you are only doing nails at home. I can’t find a complete list of equipment. 💅

    Reply
    • Jenica Parcell says

      January 13, 2020 at 2:08 pm

      All the products I included in the post are the ones I would get! I wish you the best of luck! 🙂

      Reply
  30. Alex says

    December 19, 2019 at 11:37 am

    Here’s a random question. I know this is an old feed but I’m interested to see what you have to say. I’ve gotten a gel manicure before and the primer that was put on my nails gave me the weirdest sensation all over my body! It happened the instant it touched my nail! So strange. I’ve had lots of gel manicures prior to that but never had this problem before. Has anyone ever heard of a reaction like this? I’m interested in any feedback!

    Reply
    • Jenica Parcell says

      January 13, 2020 at 2:07 pm

      Oh no I’m so sorry! That sounds terrible! Maybe it was something in that specific brand of primer? I’m sorry that happened to you!

      Reply
    • Michelle says

      June 9, 2020 at 5:20 am

      I have the same thing happen to me! It’s like a cold sensation that starts in my mouth. It reminds me a little bit of the feeling I get when I am first given anaesthesia before surgery. Weird! And I am also cracking up because I was noticing you were writing “let’s be friends” to people and I thought that was odd- then I realized you were giving the name of the polish! Lol!

      Reply
  31. Mel says

    January 2, 2020 at 12:40 am

    I followed your post today and loved it. Thanks for a great article

    Reply
    • Jenica Parcell says

      January 5, 2020 at 5:58 pm

      I’m so glad! Thank you! 🙂

      Reply
  32. Carol says

    January 10, 2020 at 5:57 pm

    Hi! I read your tutorial and bought all the stuff. Had a chunk of time this afternoon to do it but it ended up taking more than four hours! The stuff just wouldn’t dry!!! Not sure what I did wrong but I won’t give up. I’ll give it another go sometime. Thanks for a nice tutorial!

    Reply
    • Jenica Parcell says

      January 21, 2020 at 8:01 pm

      Oh no! I’m so sorry, that’s the worst! I hope it works better the next time!

      Reply
  33. Dorie says

    February 6, 2020 at 11:35 am

    I am so excited to try doing gel nails at home. My salon uses structure gel for my nails, under the base coat because my nails are not very strong. Do you have any experience with structure gel and if so can you recommend a brand that I can access as a beginner? Your instructions are fantastic!

    Reply
    • Jenica Parcell says

      February 13, 2020 at 10:21 am

      I don’t have any experience with that, so I don’t have a recommendation, I’m sorry! It sounds awesome though! 🙂

      Reply
  34. Belinda says

    February 22, 2020 at 11:02 pm

    I am saving so much money doing my own nails at home. It takes so much time and money to keep up a decent overall physical appearance sometimes so when I am able to bank a few of the otherwise directed $$ I am so incredibly grateful. I am going to order the glass nail fall. Thanks for the tips. Your nails look lovely. Peace and love xo

    Reply
    • Jenica Parcell says

      February 26, 2020 at 9:41 am

      Thank you so much! I hope you love it! 🙂

      Reply
  35. Allie says

    February 24, 2020 at 11:05 am

    Hi, thanks for the tutorial! This might sound like a silly question but do you do one hand from start to finish before moving on to the other hand or do you alternate for each step?

    Reply
    • Jenica Parcell says

      February 27, 2020 at 10:28 am

      I do one full hand and then move on to the next hand! There’s no right or wrong way, I just find that to be the easiest way for me! 🙂

      Reply
  36. Jean says

    March 19, 2020 at 12:20 am

    Thank you so much for the detailed instructions. I usually go to a little local salon for gel nails just so my hands look neat and fresh (and my own nails flake a lot). But… I am stuck in the house as my husband has several health conditions and due to the corona virus we are in isolation. I have been toying with the idea of buying my own kit and having a go. It would normally be even better to master this as my 2 grown up girls would no doubt be using my kit to have a go too. Hopefully this dreadful virus will pass soon and we can get back to normal but it would be a great opportunity to practice while I’m stuck in the house. Added benefit is that I get to look better too. Thank you so much for your help with this and stay safe.

    Reply
    • Jenica Parcell says

      March 19, 2020 at 10:17 pm

      Of course! I’m so glad it will help! And definitely a good time to do it 🙂

      Reply
  37. Barb says

    March 19, 2020 at 9:30 pm

    Hi, I’ve been doing gel nails from home for a while and the problem I’m having is they peel off fairly quickly. Do you know what causes this or what I can do to prevent this?

    Barb

    Reply
    • Jenica Parcell says

      March 19, 2020 at 10:18 pm

      If I follow these directions exactly, mine don’t peel so I just need to make sure that I follow each step and it works for me perfectly! 🙂

      Reply
  38. Marianna Gronek says

    March 24, 2020 at 9:37 pm

    What does it mean if the gel polish never hardens and stays tacky? I’ve even left my hands in the light for 180 seconds to get it to harden.
    I’m using this UV light: MiroPure UV LED Gel Nail Lamp Light Dryer, Fast Dry 48w Professional Nail Dryer Curing Lamp with Smart Sensor for Home and Salon.
    Thanks for any help you can give me!
    Marianna

    Reply
    • Jenica Parcell says

      March 26, 2020 at 8:37 pm

      I’ve never had that happen! Maybe reach out to the brand of polish you’re using? Also, are you making sure to wipe it off with alcohol after?

      Reply
  39. Hazel says

    April 18, 2020 at 7:05 pm

    Thank you so much for this. I have also bought the things I need using your list of things you need. I have also saved your page in my favourites for the things I need to learn. Thank you xxx

    Reply
    • Jenica Parcell says

      April 20, 2020 at 11:14 am

      Thank you! I hope you love them! 🙂

      Reply
  40. Janell Wait says

    May 8, 2020 at 1:47 pm

    I just tried gel on my toes, it’s been a couple hours and they are still tacky, what did I do wrong? I put them under the lamp after each coat 🤷‍♀️

    Reply
    • Jenica Parcell says

      May 18, 2020 at 1:38 pm

      Make sure you wipe off the top with alcohol, otherwise it will stay tacky!

      Reply
  41. Kaga Nails says

    June 14, 2020 at 7:40 am

    Such an interesting post and I am glad to read this information. Thanks for sharing it.

    Reply
    • Jenica Parcell says

      June 16, 2020 at 9:47 pm

      Of course, I’m glad you liked it!

      Reply
  42. Nooora - Nails says

    June 23, 2020 at 11:07 am

    Cannot thank you enough to have come across the Acrylic Nail Art Soak Off Clips, they are really good in order raise our service standards.

    Ordering Straight Away. Keep Sharing These COOL Things

    Reply
    • Jenica Parcell says

      June 25, 2020 at 10:46 pm

      So glad you found it useful! 🙂

      Reply
  43. Pam J says

    July 8, 2020 at 8:48 pm

    Thanks for the ideas. I have been doing mine for a couple of months. I do almost exactly the method you suggest. My question: sometimes my nails look great when they go under the light, but they come out with a few nails that look crumbly like I bumped them on something, but I didn’t bump them. Help??

    Reply
    • Jenica Parcell says

      August 4, 2020 at 8:50 pm

      That’s never happened to me before! I have heard that sometimes the light that you use can cause shrinkage. You could try putting your nails in for 3 seconds, out for 3 seconds, etc. when you dry them to see if that helps! I know some nail polishes in combination with some lights do cause shrinkage!

      Reply
  44. Jam says

    January 8, 2021 at 4:11 pm

    Thank you sharing wonderful stuff. Really helpful

    Reply
    • Jenica Parcell says

      January 26, 2021 at 2:42 pm

      Thank you!

      Reply
  45. Genesis Rum says

    January 26, 2021 at 7:47 pm

    this article was sooooooo helpful!! thank you! you explained everything so well, i learned a lot.:)

    Reply
    • Jenica Parcell says

      February 24, 2021 at 8:57 am

      I’m so glad to hear that! Thank you!!

      Reply
  46. Manikyur says

    April 8, 2021 at 10:30 am

    This is the best and most detailed guide I’ve seen! Thank you very much for sharing your useful experience!

    Reply
  47. Carol says

    August 24, 2021 at 6:50 pm

    I’ve been thinking of doing my nails at home too. Loved your article…. So I may do this! Are you still doing your nails at home?

    Reply
    • Jenica Parcell says

      January 31, 2022 at 8:46 pm

      I haven’t done them at home for a while but if I did, I would use the method! It is super easy and if you follow it exactly, you’ll get a great at home mani!

      Reply
  48. Sophia Peterson says

    September 28, 2021 at 12:37 pm

    Hello! I’ve been using this guide and I love it! Do you have any ideas on how to keep your nails strong? I’ve been doing this method for about a month now and it’s working great but my nails are getting really thin and trying to break a lot. Thanks in advance!!

    Reply
    • Jenica Parcell says

      January 31, 2022 at 8:45 pm

      I love collagen! This is my favorite here: https://modere.co/3u1oWgm. If you use that link you get an extra $10 off! I hope that helps you!

      Reply
  49. Peenal says

    January 15, 2022 at 12:16 am

    Hi, loved your article about doing gel nails at home. Well explained 👍

    Reply
  50. Gillian Kerry says

    January 31, 2022 at 5:42 am

    I tried doing my nails at home using a LED lamp following the instructions given but each layer didn’t dry properly and was sticky/tacky, so I had to take it all off. Where did i go wrong?

    Reply
    • Jenica Parcell says

      January 31, 2022 at 8:39 pm

      I’m not sure! I would check the quality of your bulbs on the lamp and make sure to apply really thin layers each time! Also, not all gel polish is created equal. Make sure you’re using a good brand! 🙂

      Reply

Leave a Reply Cancel reply

Your email address will not be published. Required fields are marked *

Recipe Rating


Primary Sidebar

Let’s Connect

  • Instagram
  • Pinterest
  • YouTube

MEET JENICA


My name is Jenica and I'm so glad that you're here! I started this blog in 2014 to share the best deals on the nicest things because I believe we all deserve to live the best life on less. Read more...

Search

A Slice of Style Newsletter

get latest updates, new releases, & exclusive tips and deals straight to your inbox!

Latest Favs

Latest Videos

Shop My Instagram Pictures!

  • About
  • Infertility & Pregnancy
  • Motherhood
  • Recipes
  • Privacy Policy

jenicaparcell

✨ Affordable fashion daily!
✨ Infertility support 👉🏻 @fearless.infertility
✨ mama to IVF twins + baby boy 🥹🙏
✨ [email protected]

Affordable Fashion + Empowered Infertility
When Taylor Swift tickets found ME 2 weeks ago fro When Taylor Swift tickets found ME 2 weeks ago from my good friend @jennie.theldsmissioncoach, I took it as a sign that it was meant to be!!!! ✨ What a FUN WEEKEND!! @jocelynstimpson @mal.bouchard met in Vegas and this is the story! 😍

Tips if you go to a concert on this tour:

✨ Dress up!! It was SO much fun to see everyone’s outfits!
✨ Expect everyone to be so nice 🥹 Taylor Swift fans are so sweet! There was a girl at the airport that saw we were going to the concert and gave us a friendship bracelet! 🤣🤍
✨ WEAR COMFORTABLE SHOES!! Even if you have to change your planned outfit! I PROMISE this is a big deal 🤣 You stand/sit/dance for over 3 hours in the stadium just with her performance + the opener + walking time! Our legs and feet were tired by the end and we even had comfy shoes on! Some girls wore heels and were limping at the end 😭
✨ If you can, stay at a hotel within walking distance of the event venue! That made it SO much easier to get back afterward and you’ll be tired!
✨ Have FUN!!! Oh my goodness - the energy of this tour is UNREAL! Taylor Swift and her team have created something so magical! I think you’ll love it if you’re a fan!👏🏻

#erastour #erastouroutfit #erastourtaylorswift #erastourvegas #taylorswiftconcert #taylorswiftfan
No one cares. Enjoy the bite 🤣 #funnybuttrue No one cares. Enjoy the bite 🤣 #funnybuttrue
✨ Which blazer is your fav? I found my new fav b ✨ Which blazer is your fav? I found my new fav blazer in the PERFECT fit and length!! Got it in 3 colors because I’ll be wearing them a LOT. Which would you choose?!

Wearing a small for reference! Message below if you want the link and I’ll DM it to you!

I’m BACK to posting to my fav affordable fashion items and products here on this account! I’VE MISSED IT!!!! I’ve got the support I need to create time to do it now and your girl is BACK! For infertility support, you can head to @fearless.infertility 🤗🤗🤗 #affordablefashion #amazonfashionfinds #dealsandsteals
Fearless Infertility episode 103! Out today on all Fearless Infertility episode 103! Out today on all podcast platforms ✨ #podcastersofinstagram #podcasthost #infertilitywarrior #infertilityjourney
It’s my 36th birthday and I’m surrounded on al It’s my 36th birthday and I’m surrounded on all sides with people who are INCREDIBLE! 😭 People who encourage me, point out my strengths, forgive my weaknesses and think the room is better with me in it.

I think we all deserve this positive energy 🤍

I am blessed beyond measure to help women with infertility every day, and to be a mother, wife, daughter and friend. Life has painful lows and glorious highs and I’m so grateful to be a witness to it all.

Harris spent several hours making my favorite birthday gift to date. 🥹 (swipe to see). #36thbirthday #birthdaygirl #gratefulforlife #ilovepeople
You need people who GET YOU. Who CHEER you on. Who You need people who GET YOU. Who CHEER you on. Who encourage you in your losses and celebrate you in your wins. You need friends. You need coaches.

Do you have your support system set up to thrive??

Who feeds your soul?

Who makes you think bigger?

Who rejoices when you enter the room?

No one is perfect, but when you find these people for you, you will start to accept nothing less.

The negative, soul sucking energy you let in your life will simply start to fade without drama because you deny that type of energy.

Will you let it? Do you think you deserve it?

Tag your people below!

Thank you for being one of my people @brookecasanovas 🔥

#playbig #empoweredinfertility #riseup #ivfsuccess #fertilityrescripted
I just passed 100 episodes of the Fearless Inferti I just passed 100 episodes of the Fearless Infertility podcast!!!

100 times showing up and pressing record, hoping people would listen and that I wasn’t talking to myself.

100 episodes hoping to lighten at least ONE woman’s concerns so she wasn’t alone during infertility.

100 episodes of sharing tools that would remind women with infertility that they are stronger than they possibly know.

AND I’M JUST GETTING STARTED!!!

🎉 To celebrate, I teamed up with some of my favorite (and incredibly generous companies!) to give TWO of you a MASSIVE prize package!!! 🎉

* A gift card from @coconu 
* A $50 gift card from @thehypochlorouscompany (my FAV non toxic cleaner)
* A prize of your choice from @stanley_brand limitations may apply)
* A $75 gift card from @saranoniblanket
* A gift from @pmdbeauty
* A bottle of Natural Hair Oil from @amazinghairsaviour
* A $75 gift card from @shinecosmetics

TWO WINNERS announced March 27th - one on the podcast and one on the Fearless Infertility newsletter.

To enter, write a review on Apple Podcasts + share a fav episode to your stories!

Let me know you did here and on http://fearlessinfertility.com/giveaway.

Love you, friends!!! #infertilitysisters #infertilityawareness #ivfsisters #adoptionstory #ttcsisters
Cancún. Night time. Baby’s sleeping in his slee Cancún. Night time. Baby’s sleeping in his sleep pod in our room. Tyler is in his parent’s room playing games.

And I’m in the bathroom of our room dancing by myself with my headphones in having the time of me life 🤣

I caught a glimpse in the mirror and laughed. I’m who I am now because I had to learn the tools to move through my trauma and THRIVE.

It’s the best thing I did and continue to do for myself.

It’s the best thing I do and continue to do for my children.

It’s the best thing I do and continue to do for my relationship with Tyler.

It’s the best thing I do and continue to do for my career.

It’s the best thing I do and continue to do for my clients.

There are tools for your mental, emotional, spiritual and physical health that will allow you to THRIVE even when it’s hard, sis. You’re gonna be okay. 🤍

#infertilitysupport #infertilitycommunity #infertilitytribe #wholebodywellness
Load More... Follow on Instagram

Copyright © 2023 · Refined theme by Restored 316

We are using cookies to give you the best experience on our website.

You can find out more about which cookies we are using or switch them off in settings.

A Slice of Style
Powered by  GDPR Cookie Compliance
Privacy Overview

This website uses cookies so that we can provide you with the best user experience possible. Cookie information is stored in your browser and performs functions such as recognising you when you return to our website and helping our team to understand which sections of the website you find most interesting and useful.

Strictly Necessary Cookies

Strictly Necessary Cookie should be enabled at all times so that we can save your preferences for cookie settings.

If you disable this cookie, we will not be able to save your preferences. This means that every time you visit this website you will need to enable or disable cookies again.